
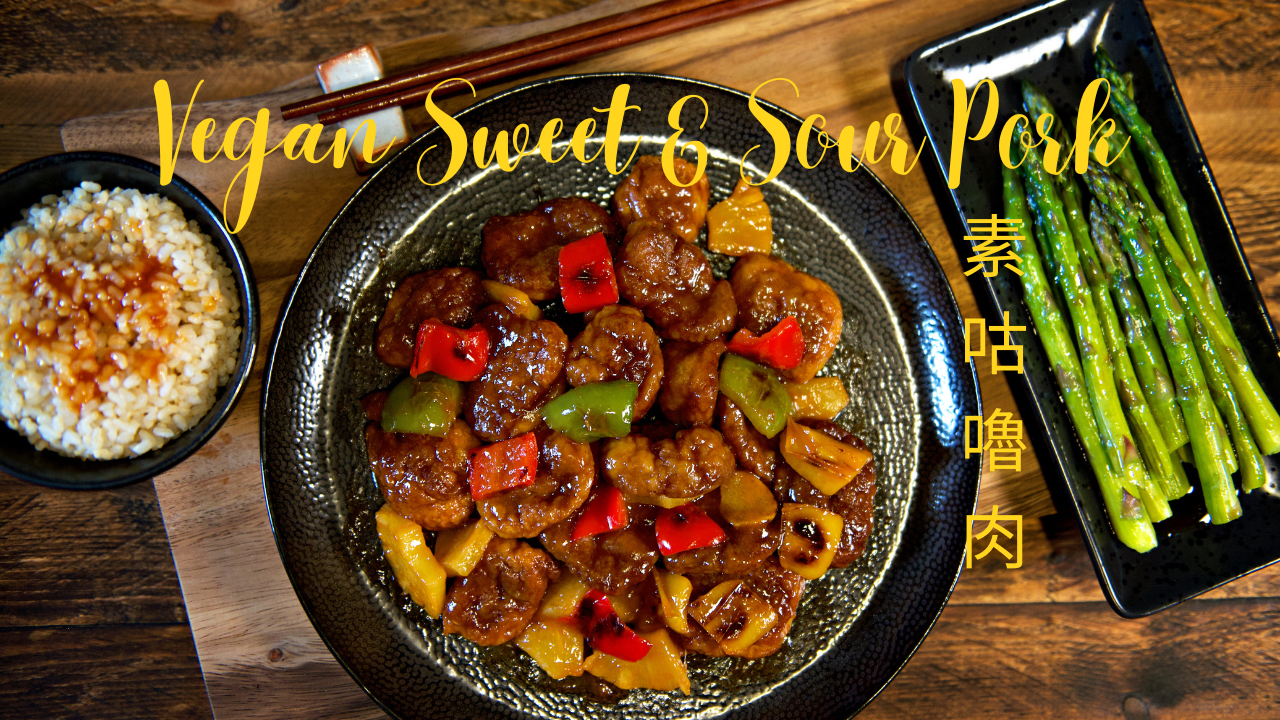
Vegan Cantonese Style Sweet & Sour Pork
素廣式咕噜肉
I’m so excited for you to try making this!
( 中文食譜在下面 For the Chinese recipe please scroll down)
This vegan "pork" is not produced using typical seitan cooking methods or the traditional wash the flour technique, or shop bought fried-gluten balls; they would not have been able to achieve this texture. My recipe of this vegan sweet and sour pork doesn't require deep-frying, but the results of this vegan meat is super light and fluffy, healthy and indulgently delicious when is cooked with the most irresistible homemade sweet & sour sauce!
This simple recipe is a time and effort saver, so easy to do and absolutely fool-proof! It replaces the traditional methods - that were originally created by washing the flour, then deep-frying the dough, to become a type of fried gluten balls before being used in all sorts of mouth-watering and magical Chinese vegan and vegetarian recipes. Fried gluten is the backbone of lots of amazing veggie snacks and vegan dishes in China, Hong Kong, Taiwan and the Far East region. We grew up eating it all our lives, from street vendors, canteens in temples, to vegetarian restaurants.
Traditional sweet & sour pork also is one of the most popular dishes in Cantonese cuisine.
Today I’m sharing with you of how to recreate the vegan version of this dish using a new healthier method, to produce the nostalgic texture and flavour which we used to love so much.
The different version of veggie meat which I’ll show you in the next video is here:
( 中文食譜在下面 For the Chinese recipe please scroll down)
Ingredients:
For the wheat meat:
100g vital wheat gluten flour
¼ tsp salt
200ml warm water (30C)
1 tsp sugar
½ tsp dried active yeast (the type needs to dissolve in water)
Small bowl of all purpose plain flour for dusting and coating
For the sweet & sour sauce:
1 tbsp cooking wine
2 tbsp light soy sauce
2 tbsp tomato ketchup
3 tbsp rice vinegar
3-4 tbsp sugar (depends how sweet you prefer)
2 tsp sesame oil
½ cup water
For the stir-fry
3 slices ginger
¼ each mixed colour bell pepper
2 slices tin pineapple rings
Cornstarch slurry : 1 tsp corn flour mix with 1 tsp water
Method:
- Make the wheat meat: In a measuring jug, add the water, sugar, then the yeast, stir to mix, leave 5 minute to activate the yeast.
- Add the vital wheat gluten flour in a bowl, add the salt, mix to combine.
- After 5 minutes, pour the yeast and water mixture into the wheat gluten flour, use a spoon to mix together quickly into a soft dough, you need to work fast, as vital wheat gluten flour absorb water really quickly, if not mix well fast enough, could result in uneven texture.
- Once the dough is form, gently press and squeeze together for 2 minute, don’t need to do too much like kneading or pushing, as the shape and texture of the dough has more or less been formed once the water was added into it.
- Put a small bowl of hot water in the oven, put the dough next to it, close the oven door, leave for 30 minutes to proof. (Please note, when the dough put in the oven with the boiling water, the oven is not on, we only use the temperature provides by the boiling water to help the dough rises. Most doughs rise faster in a warm and humid environment.)
- After 30 minutes, get the dough out. Pre-heat the oven to 180C, brush some oil on a large baking tray. Dust the work surface with some all purpose plain flour, turn the dough over onto it, sprinkle a little more plain flour all over the dough to absorb any excess water until it’s dry to the touch.
- Cut it into two halves, keep one half of the raw dough tightly sealed in a container and leave it in the fridge for making a different version of veggie meat which I’ll show you in the next video, use the other half to make the vegan pork pieces now. If not using the remaining dough immediately, it can be kept in the fridge for 2-3 days. Cut the half dough into 1 inch small squares piece, keep them apart from each other and sprinkle more flour to prevent sticking.
- Put some plain flour in a deep flat dish. Add the dough balls in and coat each one evenly in batches, put the coated balls in a bowl and add 2 tbsp oil in to toss and cover all the pieces.
- Arrange the dough pieces on the oiled baking tray, making sure to keep good distance between each one as they will inflate and rise inside the oven.
- Put in the oven, set timer for 7 minutes, watch the dough pieces rise. After 7 minutes, take them out to turn over and to cool a minute before putting back in for another 5 minutes, the pieces may deflate at this point, but they will puff up slightly back again once inside. When the time’s up, remove the tray and cut a little slit into each “pork” pieces for letting the sauce in later during cooking.
- Cut the mixed bell pepper, pineapple rings into small squares. Mix the sweet & sour sauce ingredients in a jug.
- Put the sweet & sour sauce in a small sauce pan, add in the vegan pork pieces, stir to cover the pieces in the sauce, bring to the boil over medium heat, then cover and simmer over low heat for 10 minutes, stir to mix and press down every few minutes.
- Heat a frying pan over medium heat, add 1 tbsp oil, then the mixed peppers, sear and fry till the peppers are slightly brown before adding the pineapple and fry till slightly brown too. Pour the pork pieces with the sauce into the frying pan, toss everything together, add a little cornstarch slurry to thicken the sauce, there you have it! A deliciously taste vegan Cantonese Style Sweet & sour pork is done!
The different version of veggie meat which I’ll show you in the next video is here:
Additional tips:
How to choose Vital Wheat Gluten (VWG)?
Recently, lots of people online have mentioned that the properties of the vital wheat gluten currently available on the market seem to be somewhat different from those in the past. Recipes that had always been successful suddenly became uncontrollable. And I have been asked about how to deal with this issue by our readers or channel subscribers.
Here, I can only propose solutions based on my own recipes. Whoever has made vegan meat using my recipes such as Char Siu, Baked Gluten Puffs or Kao Fu … would know that for the wet ingredients I only use yeast, water and sugar, and I may add a little salt or oil depending on the recipe. So it’s very easy to adjust.
The protein content of each brand of VWG varies, generally ranging from 75% to 85%. I use the 85% type, but depending on the supply, it may not always be available. Protein content can affect how the dough turns out when water is added. Just like when you make any dough using flour, when kneading, you can make slight adjustments. If you feel that the dough is too dry and hard, you can add some water little by little. If you feel that the dough is too wet, then add a little dry flour until a satisfactory result is achieved. Once you have done it a couple of times, you will know exactly what to do.
素廣式咕噜肉
材料 :
素肉 :
麵筋粉 (vital wheat gluten flour) 100g
鹽 ¼ 小匙
温水 (30C) 200ml
1 小匙糖
½ 小匙乾酵母(需要溶於水的種類)
1 小碗中筋麵粉,用作吸乾麵糰表面水份和防黏之用
糖醋咕嚕汁 :
酒 1 大匙
生抽 2 大匙
番茄醬 2 大匙
米醋 3 大匙
糖 3 - 4 大匙 (取決於你喜歡有多甜)
麻油 2 小匙
水 ½ 杯
小炒材料 :
薑 3 片
三色甜椒各 ¼ 個
菠蘿圈 2 片
玉米澱粉漿:1 小匙玉米粉和 1 大匙水混合
做法:
- 做素肉:在量杯中,加入水、糖、酵母,攪拌混合,靜置 5 分鐘讓酵母活化。
- 在碗中加入麵筋粉,加入鹽,混合均勻。
- 5 分鐘後,將水和酵母混合物倒入麵筋粉中,用勺子快速攪拌成柔軟的麵團,你的動作要靈活,因為麵筋粉吸水很快,如果攪拌不夠快, 可能會導致某部份吸水量不均勻。
- 麵團成型後,輕輕按壓,揉捏 2 分鐘,不要太用力推和搓,因為一旦加入水,麵團的形狀和質地或多或少已形成了。
- 烤箱裡放一小碗熱水,把麵團放在旁邊,關上烤箱門,靜置30分鐘發酵。(請注意,當麵團和熱水同時放入烤箱時,烤箱是不需要熱度的,我們只是使用沸水提供的溫度來幫助麵團發酵。 大多數麵團在溫暖潮濕的環境中發酵得更快。)
- 30分鐘後,取出麵團。 預熱烤箱至180C,在大烤盤上刷一些油。 在工作面上撒上一些中筋麵粉,把麵團倒出來,在麵團上再撒一點麵粉,以吸收多餘的水分,直到摸上去感覺乾爽。
- 將麵團切成兩半,把一半麵團密封在容器中,然後放入冰箱内冷藏以製作不同版本的素肉,我將在下一個視頻中為大家示範。現在先用另一半製作成素豬肉。 如果不立即使用剩餘的麵團,可以在冰箱中保存 2 - 3 天。 首先將這半個麵團切成 1 英寸的小方塊,每個分開並撒上更多的麵粉以防沾粘。
- 把一些麵粉放在一個深平的盤子裡。 將麵團球加入並分批均勻地蓋滿麵粉。把每一個刷滿粉的麵團球放入碗中,加入 2 湯匙油攪拌並塗滿所有麵團。
- 將麵團放在薄刷了油的烤盤上,確保每個麵團之間保持距離,因為它們會在烤箱內膨脹並上升。
- 放入烤箱,設定計時器 7 分鐘,可以看到烤麵筋慢慢膨脹。 7 分鐘後取出翻轉另一面,待冷卻 1 分鐘後再放回烤 5 分鐘,此時烤麵筋可能會洩氣或下塌,但一旦再放進烤箱,它們便會再次稍微膨脹起來。 時間到了,取出烤盤,在每個 “素肉塊” 塊上煎一個小口,以便稍後在烹飪過程中讓醬汁進入。
- 將三色甜椒、菠蘿圈切成小方塊。 將糖醋咕嚕汁原料混合在一個杯子或碗裡拌匀。
- 把糖醋醬汁放入小湯鍋中,加入素肉塊,攪拌至蓋過醬汁,中火煮沸,然後蓋上鍋蓋小火燉 10 分鐘,攪拌均勻,每隔幾分鐘攪拌按壓一下。
- 中火加熱平底鍋,下午 1 大匙油,然後加入三色椒塊,煎炒至略呈棕色,然後加入菠蘿,也煎至两面略呈棕色。 將肉塊和醬汁加進一起攪拌,加入少許玉米澱粉水,使醬汁變滑稠一點。就像這樣, 一道美味的純素廣式咕噜肉就做好了!
** 請注意,當麵團第一次和沸水同時放入烤箱時,烤箱是沒有熱度的。烤箱只是充當個 Proofer 發酵箱(又名發酵櫃、麵團發酵盒等等)。
小提示:
麵筋粉怎樣選擇?
最近有頗多朋友說,目前市面上買到的麵筋粉,性質跟以前的好像有些不同。向來做開都成功的食譜突然變得控制不了。他們問我如果遇著這情况該如何應付?
在此,我只能依我本人的食譜提出解决辦法。跟我的素肉食譜如义燒、烤麩或烤麵筋泡芙做過的朋友都知道,我做麵筋的濕材料大致就只有酵母、水和糖,間中根據食譜需要或加少許鹽或油。所以非常容易調整。
麵筋粉每隻牌子含的蛋白質不同,一般是 75% - 85% 不等。我用的是 85%那種,但看貨源,也不一定時常買得到。蛋白質含量可以影響加進水後麵糰的效果。就像任何用麵粉搓的方法一樣,可以在加進水搓過後作少許的調整,覺得麵糰太乾硬的可以逐點水添加調教,覺得麵糰太濕的話杓量加點乾粉。直至達到滿意的效果。多做一兩次就會掌握得好了。
No comments:
Post a Comment